 Important: Only
those features that you have been granted access to will display. For
access to additional features contact your system administrator. Parents
and student users who require assistance should contact their school or
district.
Important: Only
those features that you have been granted access to will display. For
access to additional features contact your system administrator. Parents
and student users who require assistance should contact their school or
district.
Important: Only
those features that you have been granted access to will display. For
access to additional features contact your system administrator. Parents
and student users who require assistance should contact their school or
district.
Topics covered in this section:
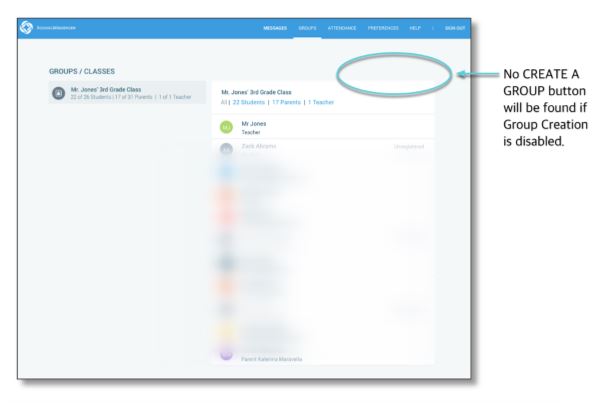
If your group creation is disabled, your Groups page will appear as below:
Important: Only those features that you have
been granted access to will display. For access to additional features
contact your system administrator. Parents and student users who
require assistance should contact their school or district.
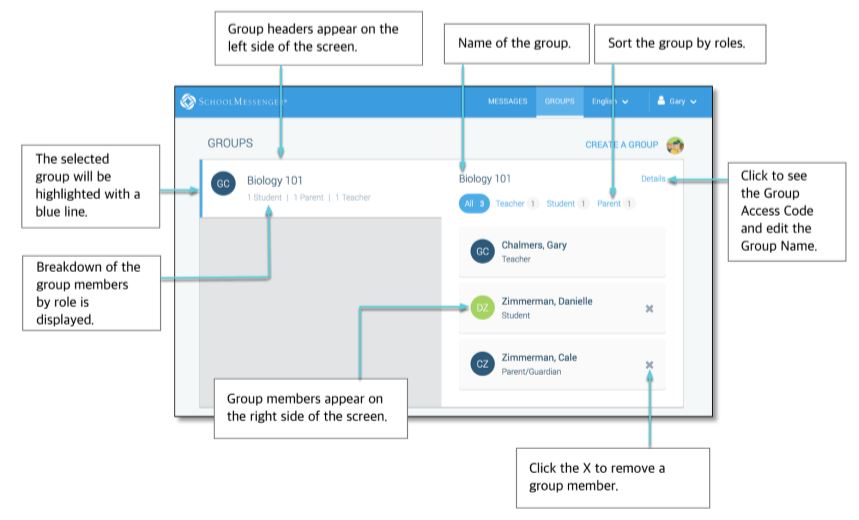
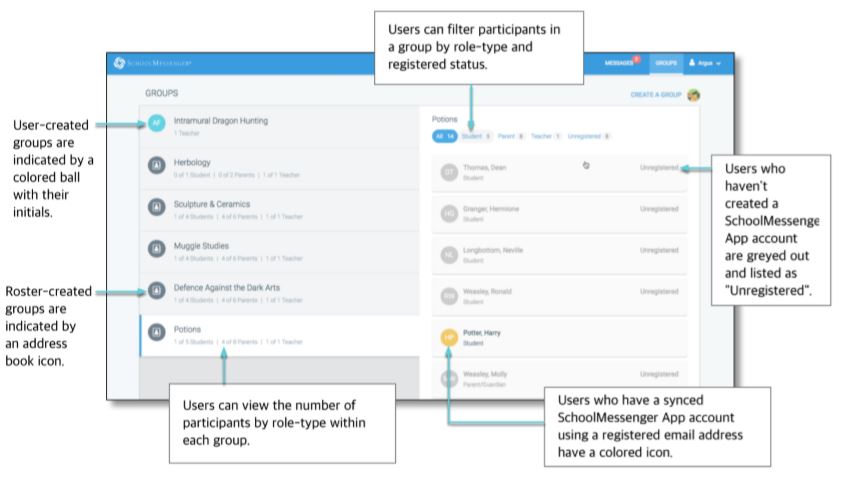
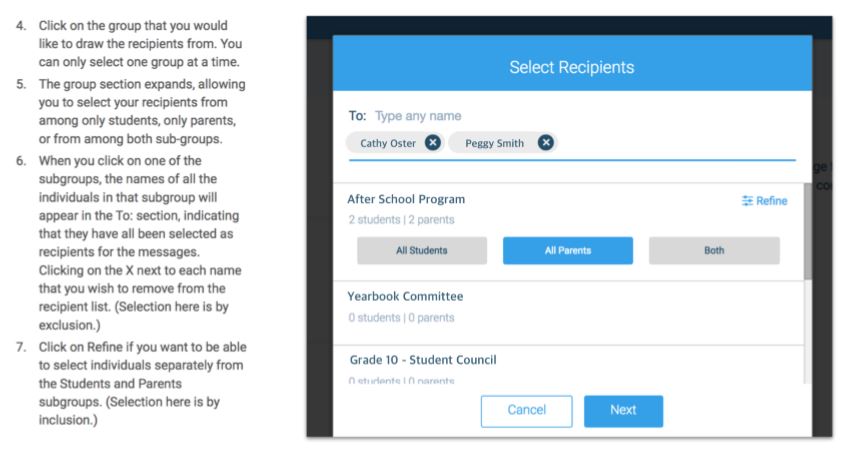
Unlike user-created groups, Roster Data Groups cannot be edited by the teacher. There isn’t a Details button that will allow the user to change the group name or delete the group. Teacher’s also can’t remove or add participants and participants can’t remove or add themselves into groups.
Important: Only
those features that you have been granted access to will display. For
access to additional features contact your system administrator. Parents
and student users who require assistance should contact their school or
district.
Important: Only
those features that you have been granted access to will display. For
access to additional features contact your system administrator. Parents
and student users who require assistance should contact their school or
district.
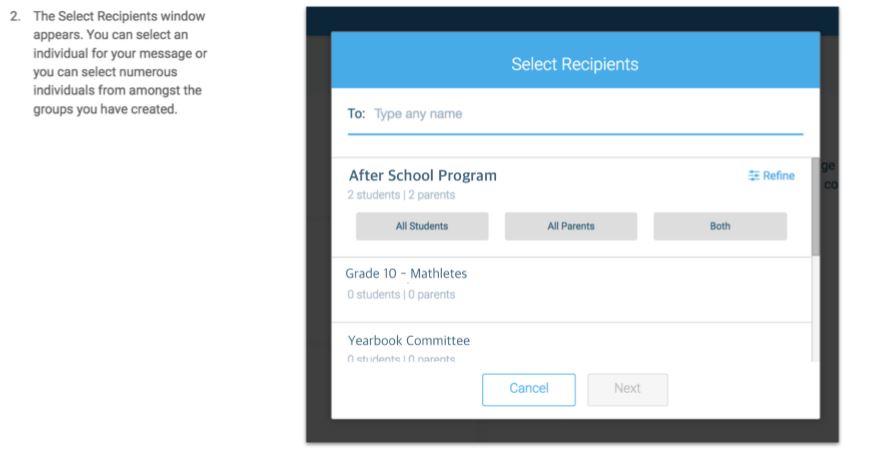
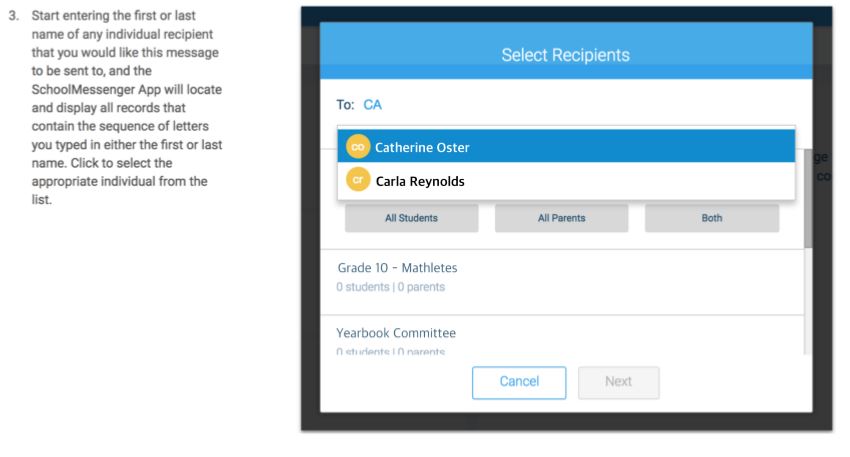
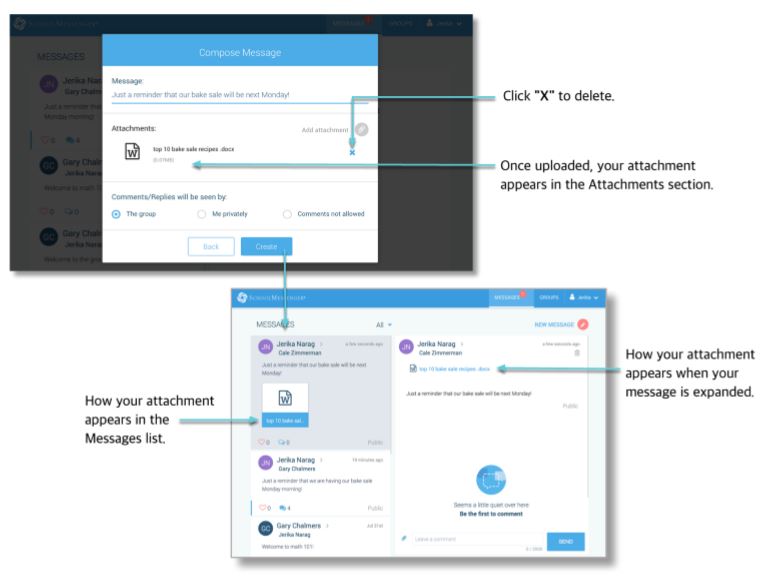
Creating a message is a very simple process. You select the recipients your message will be sent to, designate whether their comments will be readable to others in the group, solely by the teacher, or not at all (comment not permitted).
To create a Message:

1. Click on New Message.
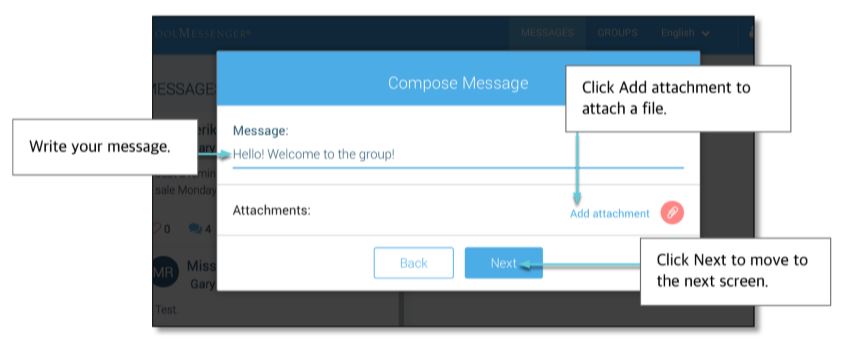
8. Click Next.
The Compose Message window appears.
If you’re ready to send your message, tap Send. You’ll then be prompted to select your Comment Settings:
· The Group: comments to your message will be seen by the entire group
· Me Privately: only the teacher will see comments sent by individuals
· Comments not allowed: no one will be able to send a response
· Commenters’ names: check the box to allow everyone to see everyone’s names
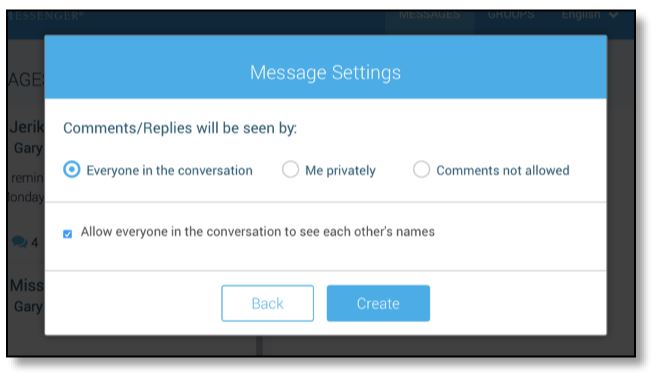
If your replies have been disabled by a system administrator, you will only have 1 option when sending your message – “Comments not allowed”:
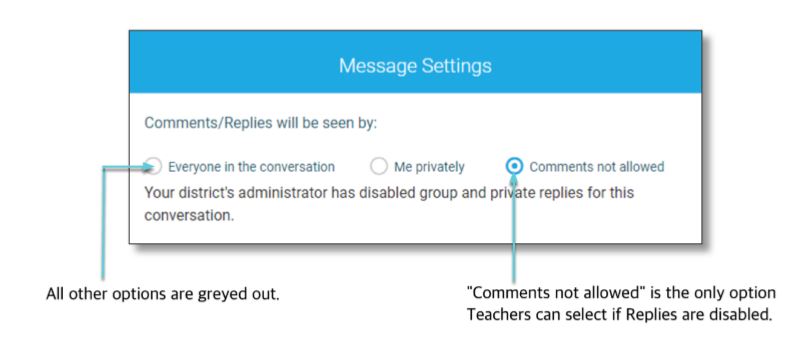
Note: If you would like comments enabled, please
contact support: (phone) 800-920-3897, (email) support@schoolmessenger.com
Important: Only
those features that you have been granted access to will display. For
access to additional features contact your system administrator. Parents
and student users who require assistance should contact their school or
district.
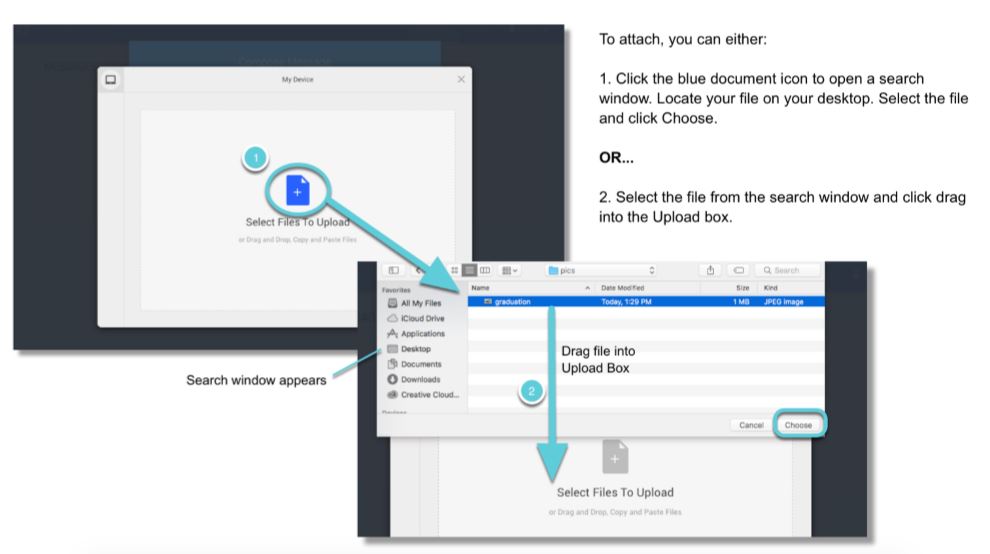
Use attachments to send the following file types to parents, guardians and students:
· images (PNG, JPG)
· documents (PDF, DOC, DOCX, PPT, PPTX)
· video (MP4)
· audio (MP3, WAV, M4A)
Note that the max file size is 20MB and you can only send 1 attachment per message.
After clicking the Attachment icon, the Upload box appears.
Teachers can delete whole message threads or single comments.

Jump to the next topic: Responding to a Message