![]() Important:
Only those features that you have been granted access to will display.
For access to additional features contact your system administrator.
Important:
Only those features that you have been granted access to will display.
For access to additional features contact your system administrator.
Intro Messages are played before your message when the recipient answers the phone. They include important instructions for pausing and replaying your message which contributes to greater success in communication.
You may wish to have a different intro message for emergency messages than regular messages. This can help alert recipients that the message regards an emergency.
Your Intro Message also plays other important roles in the successful use of SchoolMessenger by assisting with the correct handling of answering machines and voicemail, as well as giving recipients required information about how to opt-out of receiving future phone messages.
· State your organization so the recipient knows who the call is from.
· Instruct recipients that they must press 1 to listen the message or press pound (#) to place the message on hold.
· Instruct recipients that they may press 5 at any time during the message to initiate an "opt-out or unsubscribe request".
· Be brief.
Your first step in this process should be to write a script for the introduction messages for your school(s) which might sound something like this:
General Broadcasts: “This is an important message from Springfield Elementary. Please press 1 to play this message immediately. Press pound to place this call on hold. If you would like to hear options to unsubscribe this phone out of future voice messages from our schools, press 5 at any time during the message.”
Emergency Broadcasts: “This is an emergency message from Springfield Elementary. Please press 1 to play this message immediately. Press pound to place this call on hold. If you would like to hear options to unsubscribe this phone out of future voice messages from our schools, press 5 at any time during the message.”
![]() Note: If
you use multiple languages on your SchoolMessenger account and/or have
different introductions for various broadcast types, such as emergencies,
please have a script and available persons prepared for those as well.
Note: If
you use multiple languages on your SchoolMessenger account and/or have
different introductions for various broadcast types, such as emergencies,
please have a script and available persons prepared for those as well.
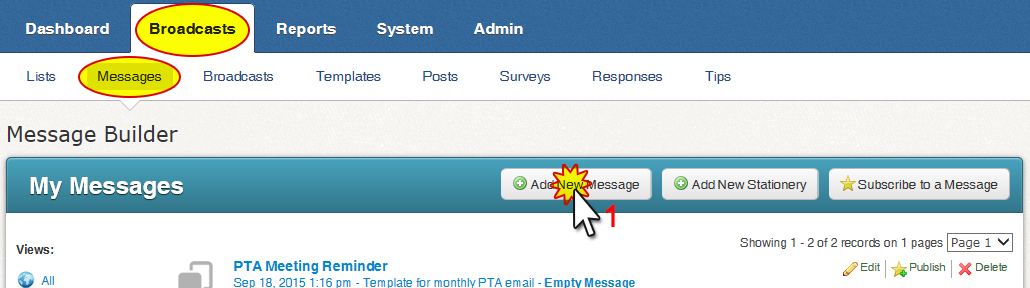
While logged in to your SchoolMessenger account, click on the “Broadcasts” tab, then select the “Messages” sub-tab.
1. Under the My Messages section of the Message Builder, click on the Add New Message button.
2. In Message Settings, enter a “Message Name” and “Message Description” then click the Next button.
3. In the Message Content section, click on the drop-down next to the first language you will record and select Record.

4. In the Voice Recording section, enter the phone number where you (or the person who will be recording) can be reached in the “Number to Call” box and click Call Now to Record.
5. The phone will begin ringing almost immediately. Answer and follow the prompts to record the intro message script. Remember to press “1” to save your message before hanging up.
6. On your SchoolMessenger account, the screen will change to give you the option to Play or Rerecord your message.
7. When you are satisfied with the recording, click the “Done” button. You will be returned to the Message Editor screen where you can see a green check next to the message type you selected.
8. Repeat steps 1 through 7 for any additional languages and/or broadcast types.
Now that your message has been saved, you will need to configure your SchoolMessenger account to use the appropriate Intro Message for each broadcast type.
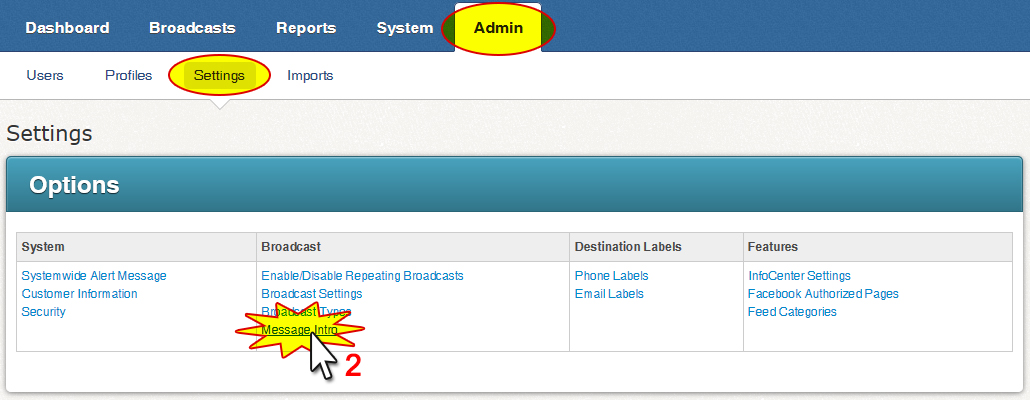
1. Go to the Admin tab and click on the Settings sub-tab.
2. In the Broadcast section of Settings, click on Message Intro.
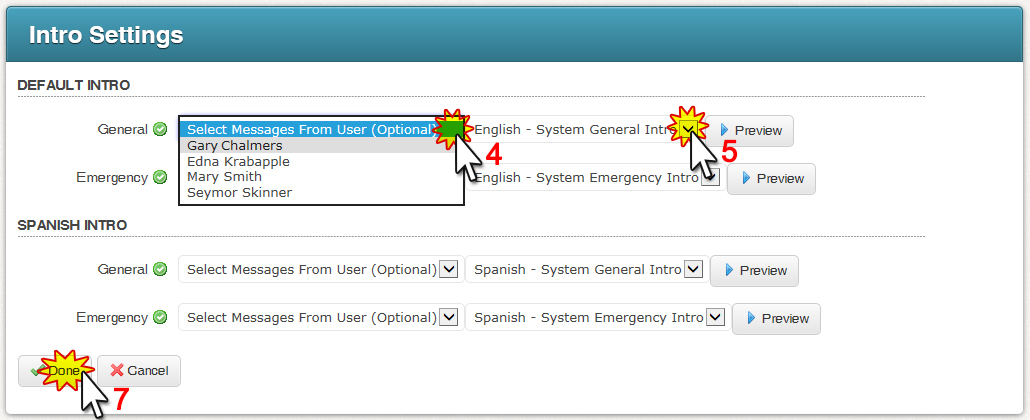
3. In the Message Intro Manager> Intro Settings, you will see a list of all the different languages your account uses, and the broadcast types under each of those.
4. Use the drop-down menu in your Default Intro section to select yourself (or the user’s account who recorded the intro message you want to use).
5. To the right of that, use the drop-down menu to select the appropriate message. We recommend using the “Preview” button to listen to each selected message to make sure it is the correct message.
6. Repeat steps 1 through 5 for each of the broadcast types and languages.
7. Click the Done button when you’ve successfully made all settings.
For information on how to take action on Opt-Out Requests, see "Phone Opt-Out Report" in the Reports section.
©2022 Intrado. Contents may not be reproduced without express written permission.