 Important:
Some menus or features shown may not appear in your account, as only those
to which you have been granted access will be visible. For access
to additional features, please contact your account administrator.
Important:
Some menus or features shown may not appear in your account, as only those
to which you have been granted access will be visible. For access
to additional features, please contact your account administrator.
Once you click the New Broadcast button, you’ll be taken to the Subject & Recipients screen. This step consists of 3 main components:
1. Subject
2. Type
3. Recipients
Note:
As
you work through the New Broadcast process, any field marked with the
orange asterisk  is a required field. Once
the requirements of a field have been met, the orange asterisk will change
to a green check
is a required field. Once
the requirements of a field have been met, the orange asterisk will change
to a green check  .
.
The Subject is the title of your broadcast. Make your subject concise and descriptive of the content of your message. Doing so helps you identify the broadcast easily in the system for future reference, as well as help your recipients quickly know what your broadcast is about.
Note: The subject
will not appear to recipients of Phone, SMS, or Social broadcasts.
Selecting an appropriate type is important as this works in conjunction with your contacts’ notification preferences. Your contacts can configure their notification preferences a number of ways (read the topic on Interactive Preferences to learn more). In selecting your broadcast type, keep in mind that some contacts may have selected certain numbers or email addresses to receive specific types of broadcasts.
Broadcast types fall into two
main categories: non-emergency
![]() and
emergency
and
emergency ![]()
Your account administrator has defined the available types available for your account to select from. Make sure you think carefully about the content and urgency of your message, then select a type that is appropriate.
"Recipients" refers to the people to whom you are sending your broadcasts. This could be parents and guardians, students, staff or anyone who's information is included in one of your account's imports and your address book. You can even send your broadcasts to yourself (recommended).
Clicking the “Add Message Recipients” drop-down menu offers a wealth of options when selecting your recipients:
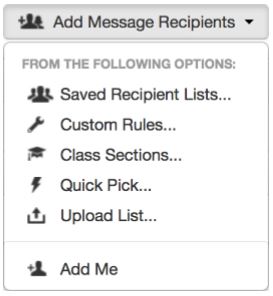
Read below for more info on your options.
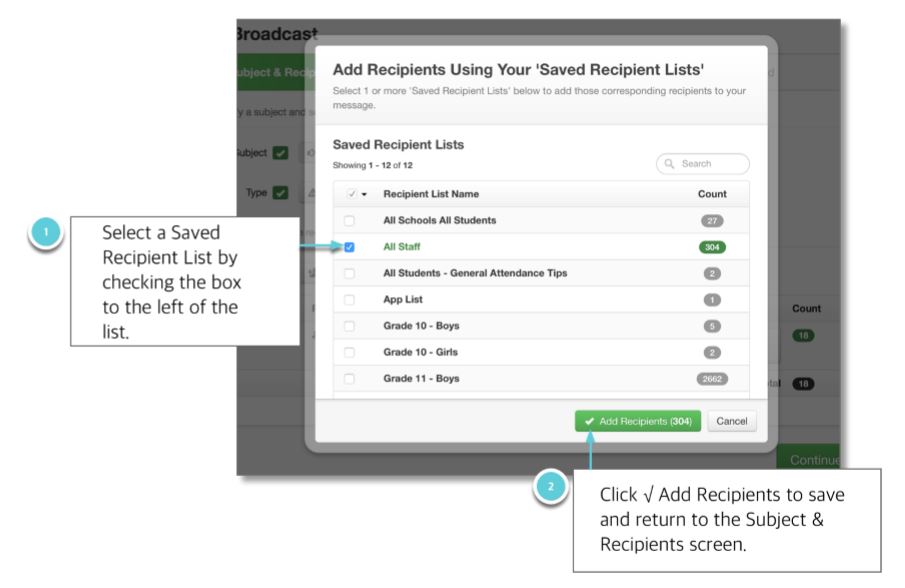
This option allows you to quickly access and use recipient lists you’ve created and saved for future use. Read more on creating and saving lists in the Create a List topic of this online Help.
Note:
Recipient lists are listed in alphabetical order. Keep this in mind when
naming your saved lists to help you organize and locate lists quickly
and easily.
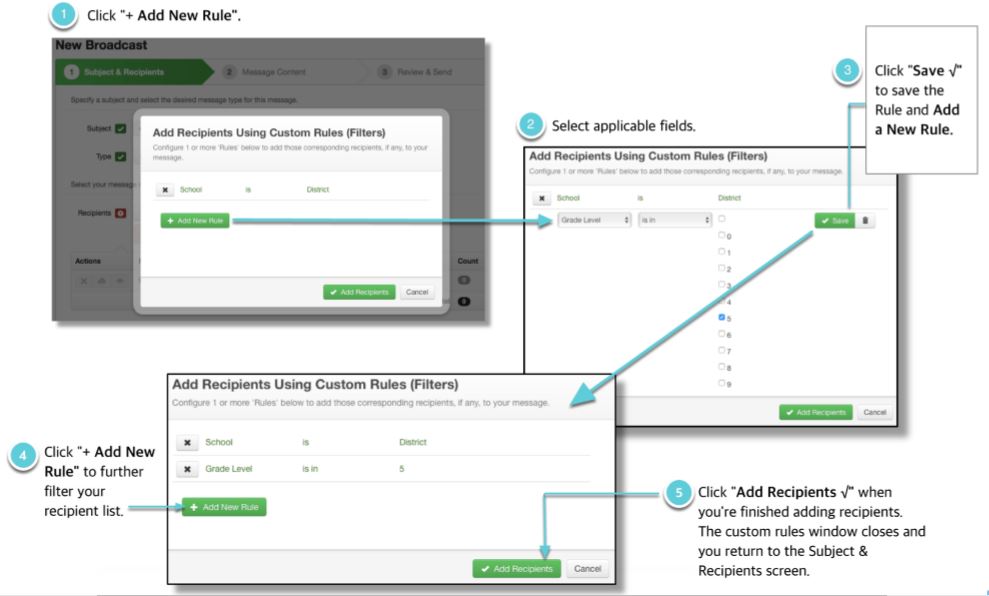
If the list of recipients you want to send a broadcast to hasn’t been previously created and saved, you can build a new one using Custom Rules (and save it for future use). Custom Rules allow you to filter and isolate specific groups of recipients from your student database files imported by your system administrator. Stack as many rules as you need to narrow down your contacts to be as specific as possible.
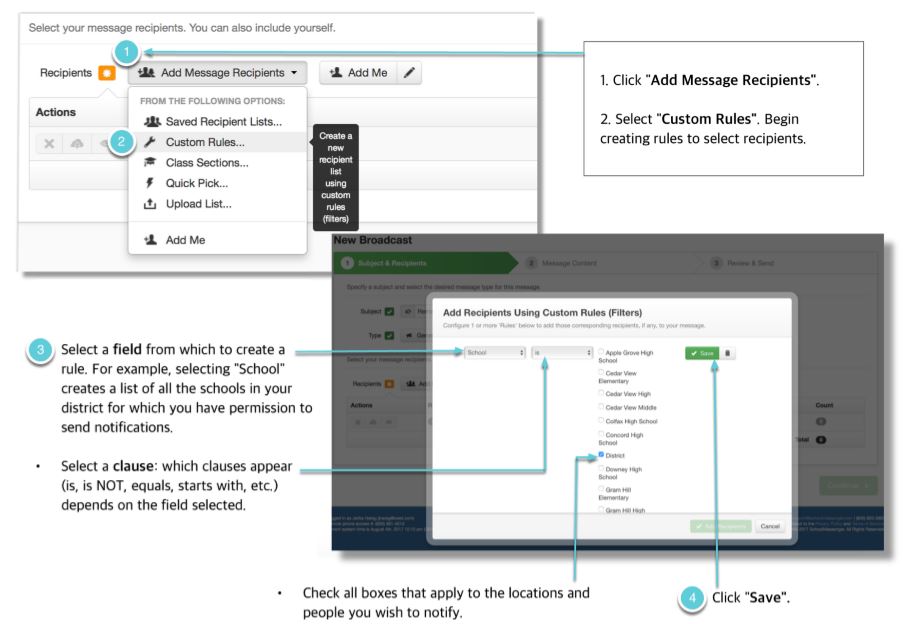
Applying rules ensures only the intended contacts receive your Broadcast and eliminates those who aren’t applicable. You can add as many rules as you need to.
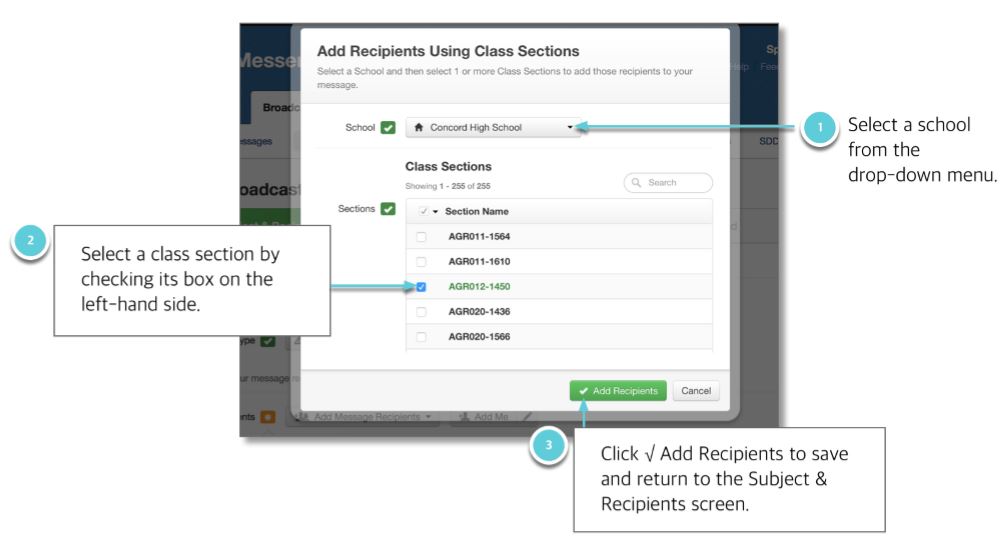
If your system administrator has imported the applicable data, you can target recipients by class section.
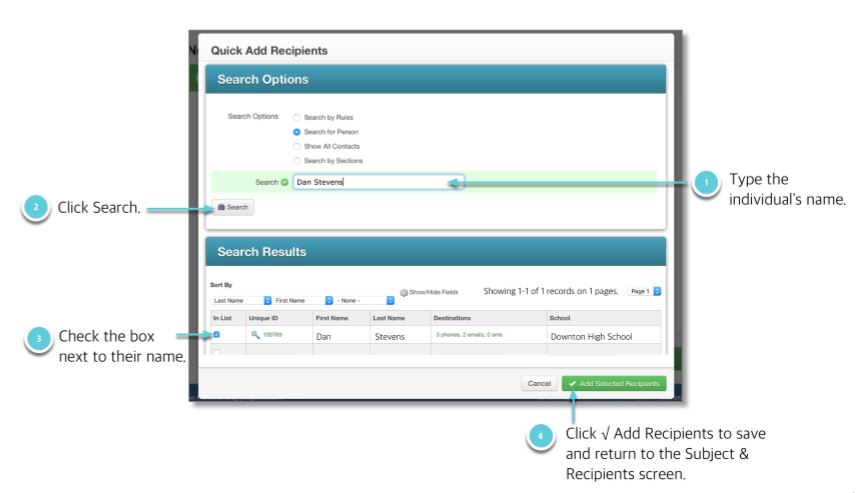
Build a simple list by searching for specific individuals and checking the box to the left of their record. You can search, narrow down the search using rules (just like in the Custom Rules option described above), pick from a list of all contacts, or search contacts by class section.
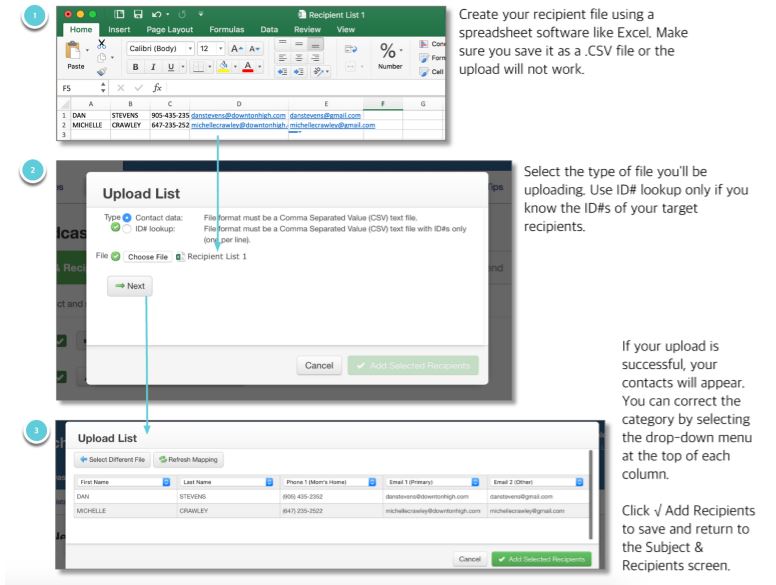
Uploading a list requires that you have a .CSV file of contacts saved on your computer. This advanced way of creating a list can be handy when the people to whom you need to broadcast may not be included in one of your account’s database imports. This option is covered in more detail in the Upload List section of this online Help.
You can either use the  button or the "Add
Me" link in the Add Message Recipients menu to add your
contact information to the broadcast. If your contact information is not
already in the system, or needs to be edited, you can click the pencil
icon on the right side of the button and enter/update your information
manually.
button or the "Add
Me" link in the Add Message Recipients menu to add your
contact information to the broadcast. If your contact information is not
already in the system, or needs to be edited, you can click the pencil
icon on the right side of the button and enter/update your information
manually.
Once you’ve selected all of your recipients, you have a few more options before you click Continue and move on to Step 2: Broadcast Content.
From the Subject & Recipients window you can:
· save the new list you created 
· preview the full list of selected recipients (and
delete any recipients added accidentally) 
· see the total number of recipients.
· remove recipients 
· edit your contact information
· target either only contacts (usually staff or students) or guardians (parents) as recipients. Both are selected by default
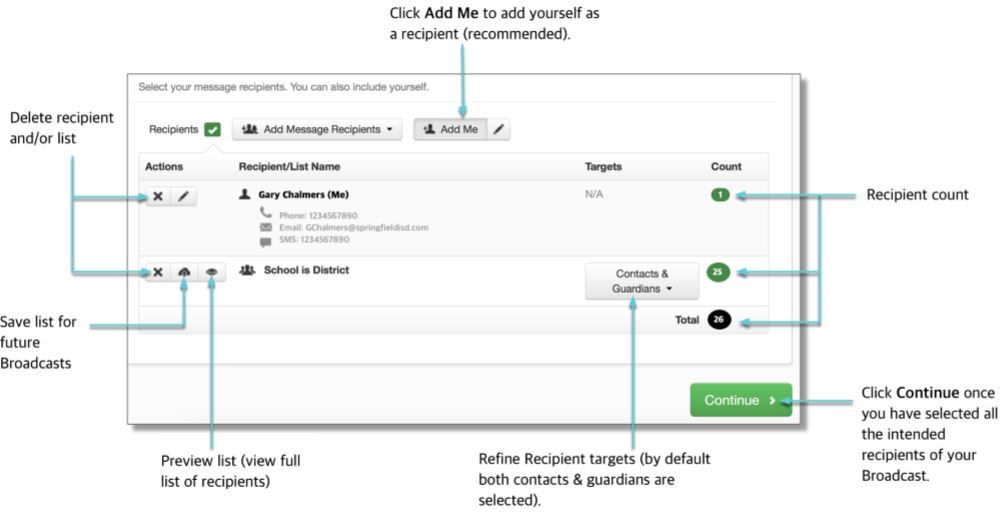
When you have finished assigning the settings for this Subject &
Recipients step, click the  button
to move on to the next step.
button
to move on to the next step.
Jump to the next topic: Step 2: Message Content
©2018 West. Contents may not be reproduced without express written permission.