![]() Important:
Only those features that you have been granted access to will display.
For access to additional features contact your system administrator.
Important:
Only those features that you have been granted access to will display.
For access to additional features contact your system administrator.
The email stationery feature lets you get creative and have fun with the appearance of your messages. The system includes several layouts which may be edited and shared with other users who will be able to use it when creating new messages.
This help topic will walk you through the process of creating and sharing your own stationery:
· Changing Stationery Default Text
· Freezing Stationery Text or Images
1. Click the Broadcasts tab then the Messages subtab.
2. Click the  button.
3. Enter a name and description for your stationery.
4. Select a generic layout to use as a base for your new stationery, as shown below.

5. Click the  button at the bottom left of the screen to start editing your stationery
using the HTML editor.
button at the bottom left of the screen to start editing your stationery
using the HTML editor.
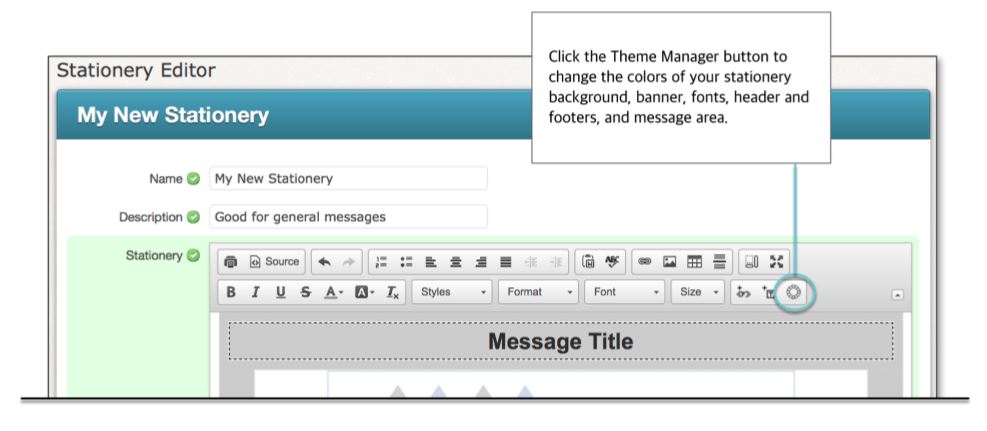
After clicking the button, you’ll be taken to the HTML editor. To edit colors, click
the  (Theme Manager)
button. The Theme Manager window
opens.
(Theme Manager)
button. The Theme Manager window
opens.
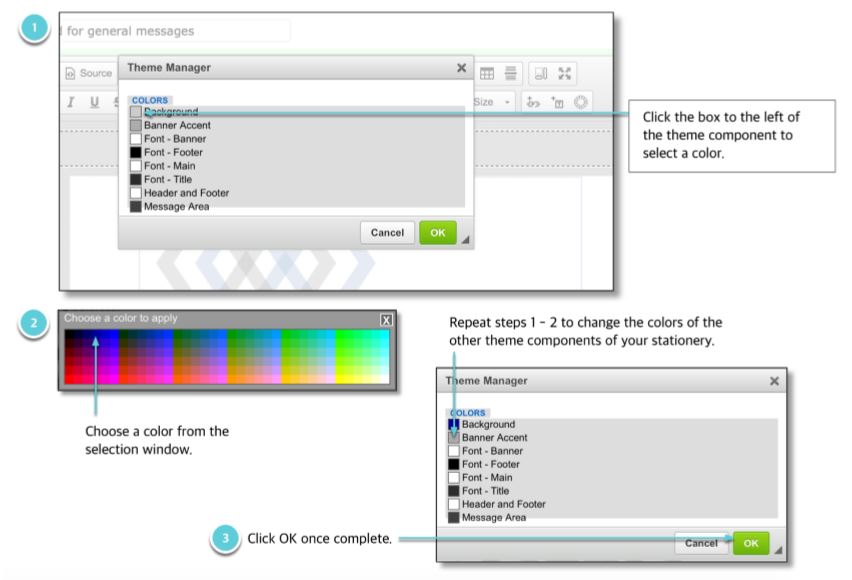
1. Click the box to the left of the theme component to select a color. The Color Selection window opens.
2. Choose a color from the Color Selection window.
3. Click OK once complete.
 Idea:
If you need a little inspiration, you can create wonderful color schemes
with complimentary colors using free color scheme designers online. Some
tools can even create palettes from images.
Idea:
If you need a little inspiration, you can create wonderful color schemes
with complimentary colors using free color scheme designers online. Some
tools can even create palettes from images.
· Continue doing this until you've changed all of the component colors you'd like to change.
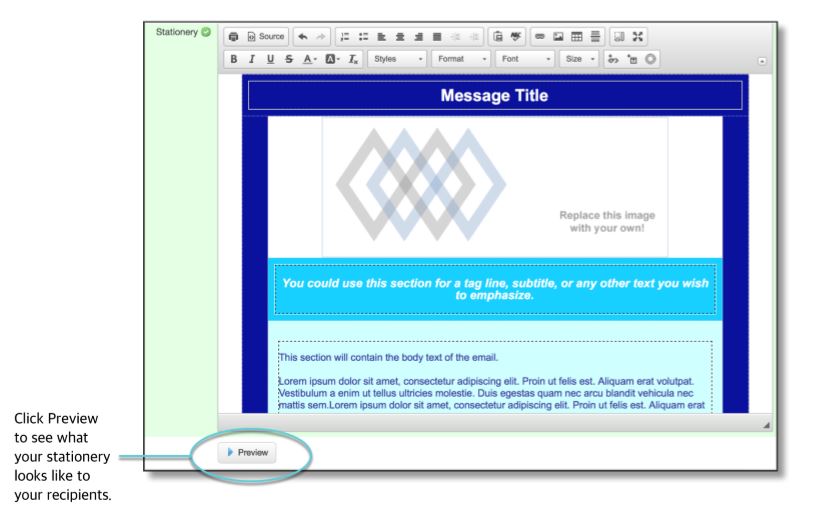
· In the image below, you can see how the example layout looks once all of the colors have been edited.
· You can preview what your stationery will
look like to recipients by clicking the  button.
![]() Important:
It's a best practice to make sure your images are small enough to
fit within small email clients such as those found on mobile devices.
Typically this means ensuring that a design doesn't
exceed 600 pixels wide. Also, many email clients do not display
images by default so it's a good idea to avoid conveying important parts
of your message within an image. There are many excellent resources online
for learning more about HTML email design if you wish to learn more.
Important:
It's a best practice to make sure your images are small enough to
fit within small email clients such as those found on mobile devices.
Typically this means ensuring that a design doesn't
exceed 600 pixels wide. Also, many email clients do not display
images by default so it's a good idea to avoid conveying important parts
of your message within an image. There are many excellent resources online
for learning more about HTML email design if you wish to learn more.
![]() Note:
If you choose to upload an image, your file should not exceed 750 kB in
size. The best formats to use for images in email are .jpg or .gif.
Note:
If you choose to upload an image, your file should not exceed 750 kB in
size. The best formats to use for images in email are .jpg or .gif.
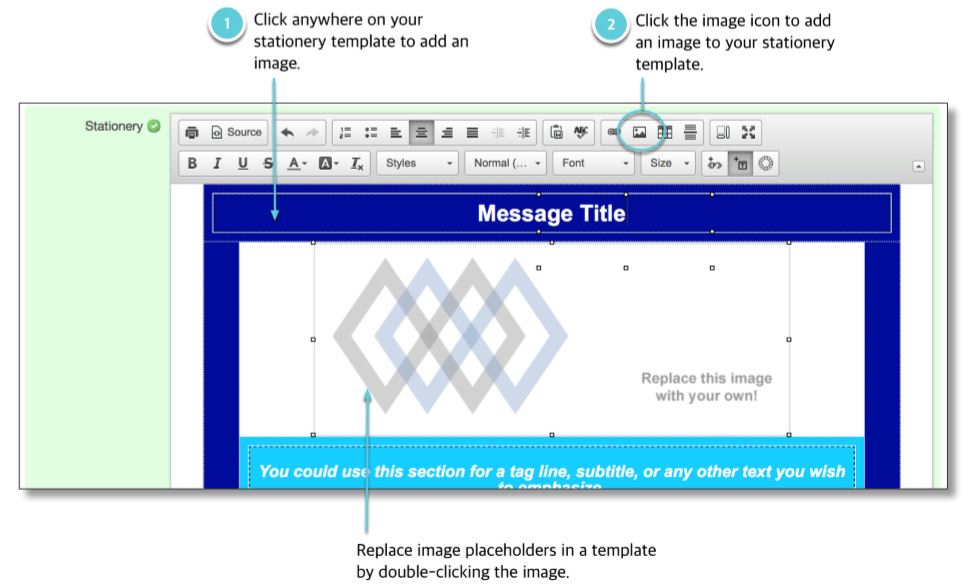
You can either add an image anywhere on template or replace the image placeholders on your stationery templates. Only some of the templates (such as the one in this example) include placeholder images which you'll definitely want to replace. Others may not have these image placeholders, but you're still free to add images if you want anywhere on the template.
· To replace an image: double click the image
· To
add an image: place your cursor where you want the image and click
the Image button 
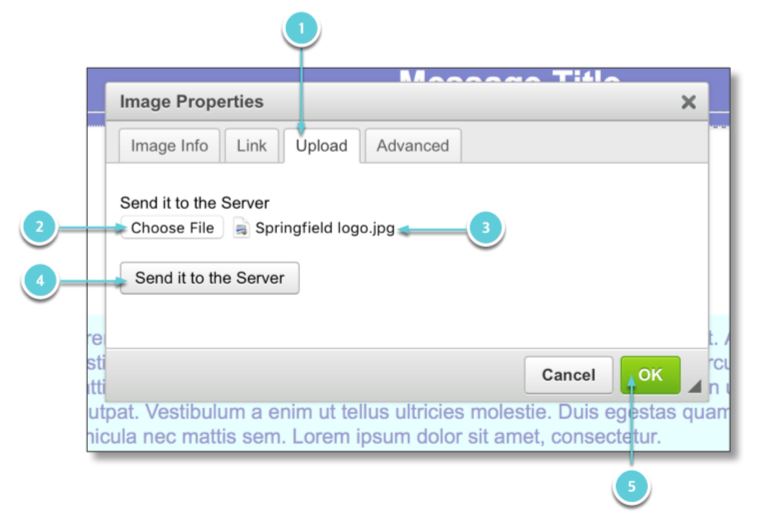
Both options open the Image Properties window where you'll have the option to:
· link to an image hosted on another site
· upload images from your computer
· If your image is hosted on another website:
1. Highlight the URL under the Image Info tab.
2. Replace the Image URL with the URL for your image.
3. Click OK.

· If you’re uploading an image from your computer:
1. Click the Upload tab.
2. Click the Choose File button
3. Select an image from your computer.
4. Click the Send it to the Server button. You’ll be taken back to the Image Info tab.
5. Click OK.
Here's the example stationery with the placeholder image replaced with the school's logo.
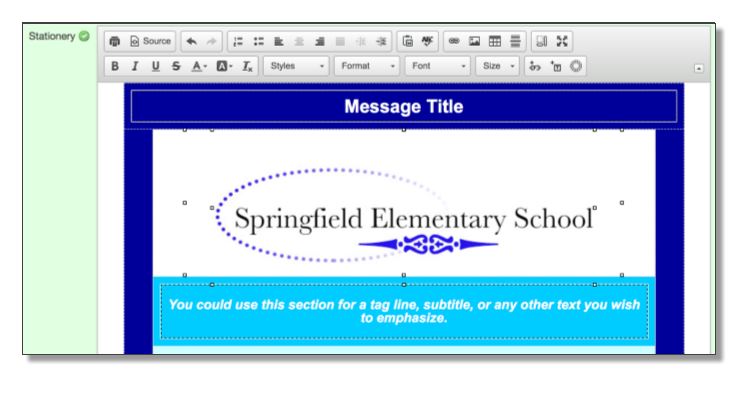
This stationery template has a banner beneath the placeholder image which could (optionally) be used for a tagline.
· Highlight the text that should be edited and simply enter the new text, as shown below.

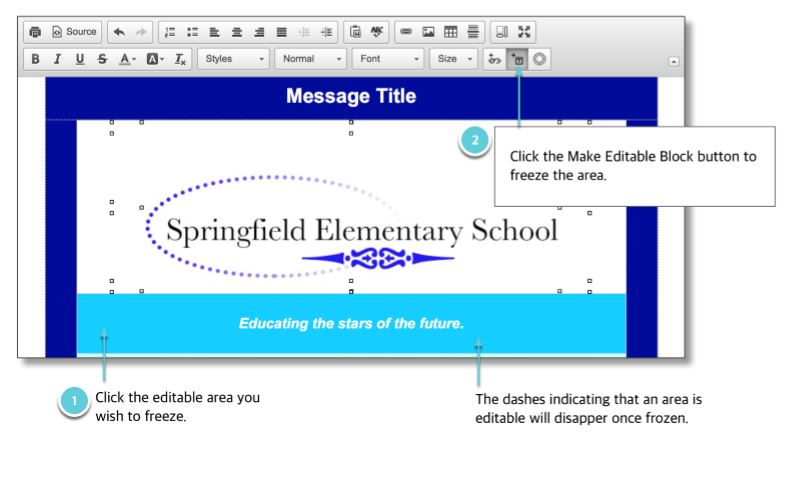
Notice that there are dashed lines around some parts of the template. This means that those sections are editable regions. An editable region is a part of the text that the users of your stationery (if you choose to publish it) will be able to change.
You may "freeze" items in place by placing an Editable Block, preventing users of your stationery from changing its contents.
1. Click on the editable region you wish to freeze.
2. Click the  (Make Editable Block)
button. The editable region becomes frozen.
(Make Editable Block)
button. The editable region becomes frozen.
The dashes surrounding an editable region disappear. Users can no longer edit that area when they use your stationery.
Once your stationery is complete, you can share it with other users in the system.
1. Click the Stationery link on the left-hand side of the screen.
2. Locate the stationery you wish to share.
3. Click the Publish link to the right of the name.

Jump to the next topic: Using Stationery in Email.
©2022 Intrado. Contents may not be reproduced without express written permission.